
ဒီအေၾကာင္းအရာကို မတင္ေတာ့ဘူးလို႔ အရင္က စဥ္းစားခဲ့တယ္။ ဒါေပမယ့္ ေျပာျပခဲ့တဲ့ အေၾကာင္းအရာေတြေကာ၊ အသစ္တင္တဲ့ အေၾကာင္းအရာေတြပါ ဒီအေၾကာင္းအရာနဲ႔ အမ်ားၾကီး ပါတ္သတ္ေနပါတယ္။ ဘယ္လိုဘဲျဖစ္ျဖစ္ စိုက္ထားတဲ့သစ္ပင္ အသီးေ၀ဆာေအာင္ ပ်ိဳးေထာင္ရမယ္ေလ။
ရံုးတစ္ရံုးျဖစ္ျဖစ္၊ အိပ္တစ္အိမ္ အတြင္း အနီးဆက္ ကြန္ပ်ဴတာကြန္ယက္ ခ်ိပ္ဆက္ႏိုင္ရန္ မိမိတြင္..
(က) Modem၊ (ခ) Switch/Hub၊ (ဂ) RJ45၊ (ဃ) Network Wire cables၊ (င) Network Card၊ (စ) NIC - Network Operating Systemမ်ား လိုအပ္ပါသည္။ အင္တာနက္ရၿပီးသား ကြန္ပ်ဴတာမ်ားအတြက္ တပ္ဆင္ၿပီးသား ျဖစ္ပါသည္။
Stetup Home of Small Officeကို စတင္ခ်ိပ္ဆက္မယ္ဆိုရင္ ဦးစြာ ....
၁။ Desktopေပၚတြင္ရွိေသာ My Network Placesကို ဖြင့္ပါ။
၁။ Desktopေပၚတြင္ရွိေသာ My Network Placesကို ဖြင့္ပါ။
၂။ ေပၚလာေသာ Windowsမွ Right Panelတြင္ Setup a Home or Small Office Networkကိုႏွိပ္ပါ။
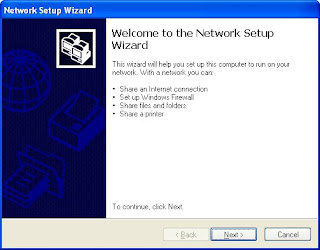
၃။ Welcome dialog boxေပၚလာေသာအခါ Next ကိုႏွိပ္ပါ။ Welcome boxတြင္ သင္လုပ္ႏိုင္သည့္ အရာမ်ားကို ေဖာ္ျပထားပါသည္။
(a) Share an internet connection
(b) Set up Windows Firewall
(c) Share files and folders
(d) Share printers။ မွတ္ခ်က္။ ။ ေဖာ္ျပခ်က္တြင္ မပါသည့္အရာမ်ား ရွိပါသည္။ ဥပမာ- Share hardware such as CD-Drive, Local Disk, USB Memory stick/card/ External HDDစသည္တို႔ကို ျပဳလုပ္ႏိုင္ပါသည္။
၄။ ေနာက္စာမ်က္ႏွာတြင္ Checklist for creating Networkအတြက္ စစ္ေဆးရမည့္ အခ်က္အလက္မ်ား ျဖစ္သည္။ ဥပမာ -
(a) Install Network cards, Modems, and cables စသည့္ စက္ပစၥည္းမ်ားတပ္ဆင္ထားရမည္။
(b) Turn on all computers, printers, and external modemsမ်ားကို ဖြင့္ထားရပါမည္။
(c) Connect to the internet - အင္တာနက္ခ်ိပ္ဆက္မွဳ ရွိရမည္။
ထို႔ေနာက္ Nextကို ႏွိပ္ပါ။
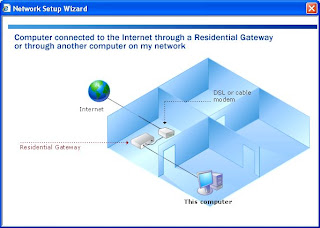
၅။ ထို႔ေနာက္ connection methodကို ေရြးရပါမည္။ မ်ားေသာအားျဖင့္ Small officeသည္ ဒုတိယ connection methodကို ေရြးေလ့ရွိသည္။ ထို႔ေနာက္ nextကိုႏွိပ္ပါ။ ဆိုလိုသည္မွာ ..
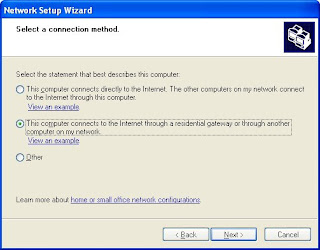
> This computer connects to the internet through a residential gateway or through another computer on my network. ဤကြန္ပ်ဴတာသည္ အင္တာနက္ connectionကို Residential gateway သို႔ အျခားကြန္ပ်ဴတာမွ ရရွိသည္။
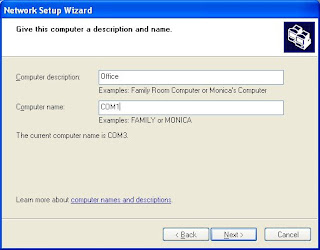
၆။ ေနာက္တဆင့္သည္ computer ေဖာ္ျပခ်က္ႏွင့္ အမည္ကို ေပးရပါမည္။ ထို႔ေနာက္ Nextကို ႏွိပ္ပါ။ ေအာက္ပါပံုအား ၾကည့္ပါ။
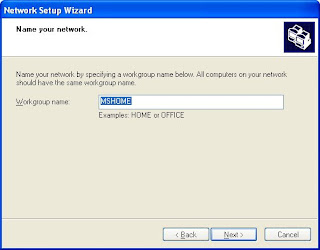
၇။ ေနာက္တစ္မ်က္ႏွာသည္ Workgroud Nameေပးရပါမည္။ Workgroup nameရိုက္ထည့္၍ Nextကို ႏွိပ္ပါ။
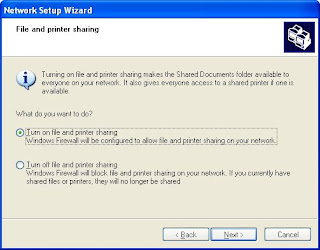
၈။ ထို႔ေနာက္ Files and Printers sharingလုပ္ႏိုင္ရန္အတြက္ ဖြင့္၏၊ မဖြင့္၏ကို ေရြးရပါမည္။ ေပးထားသည့္အတိုင္း ထားထား၍ Nextကိုႏွိပ္ပါ။
၉။ ေနာက္စာမ်က္ႏွာသည္ မိမိလုပ္ထားသည့္ Network settingsမ်ားကို ေဖာ္ျပထား၍ အသင့္အေနအထား ရွိေနေၾကာင္းကို ေျပာျပပါသည္။ Nextကိုႏွိပ္ပါ။
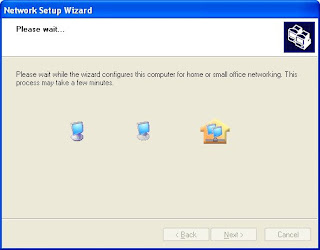
၁၀။ ဤအဆင့္သည့္ setting upလုပ္ပါသည္။ ေနာက္ဆံုးအဆင့္ျဖစ္သည့္ ႔You're almost done၌ Just finish the wizard ကို အမွန္ျခစ္ျပ၍ Nextကိုႏွိပ္ပါ။
၁၁။ Finished ကိုႏွိပ္၍ Computerအား Rebootလုပ္ပါ။
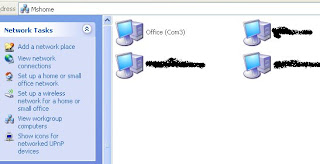
၁၂။ ကြန္ပ်ဴတာ ျပန္တက္လာေသာအခါ My Networl places > View Workgroup computerအား ႏွိပ္ပါက Network ခ်ိပ္ဆက္မွဳရွိေသာ ကြန္ပ်ဴတာမ်ားကို ေတြ႔ရပါလိမ္မည္။
မွတ္ခ်က္။ ။ ဤ Network Setupသည့္ Windows XPျဖင့္ Setupလုပ္ပါသျဖင့္ XPျဖင့္သာ တင္ျပသြားပါသည္။


0 comments:
Post a Comment